Rancher
![]() Rancher is a container management platform, encompassing a large feature set.
Rancher is a container management platform, encompassing a large feature set.
It is purposely used in Caascad only as a way to access Kubernetes® clusters.
Note
In this tutorial, please replace the following values:
ZONE_NAMEwith the name of the administrative zone (it starts withocb-).
Rancher access
In your administration environment, Rancher service is located at this address:
https://rancher.ZONE_NAME.caascad.com
Login
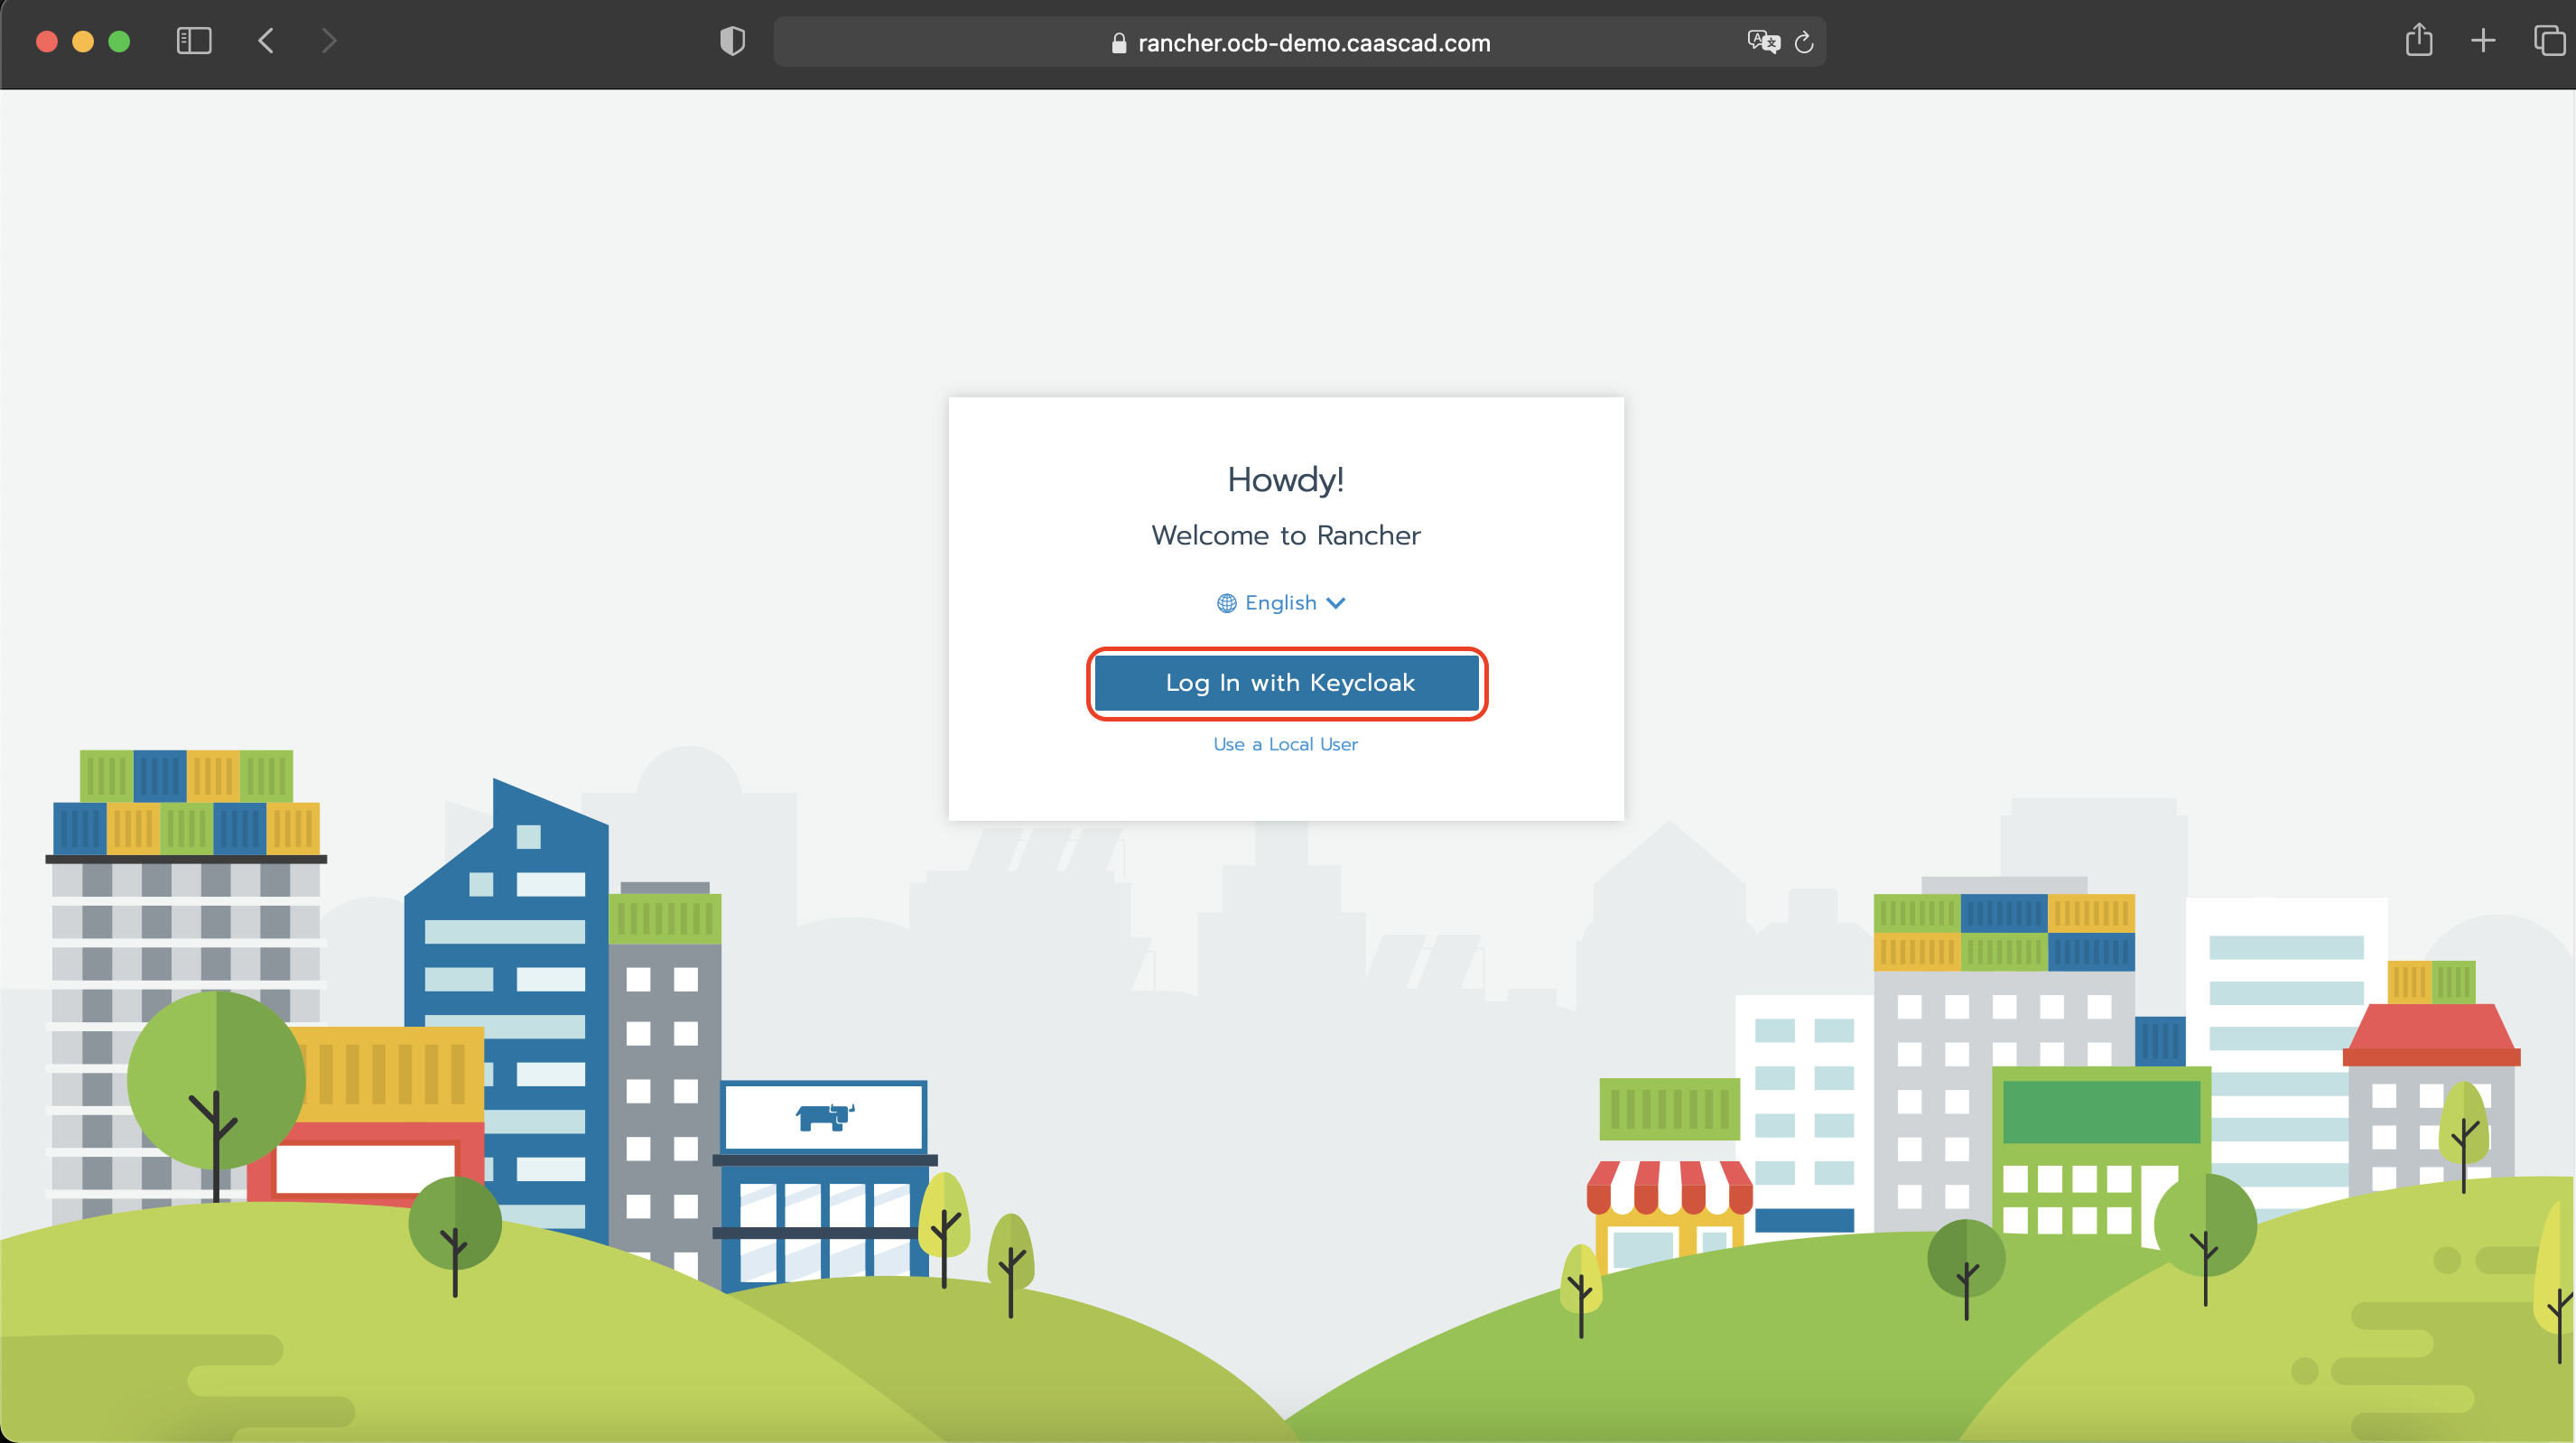
To be able to login into Rancher's WebUI, you need to use your Keycloak credentials. For more info regarding Keycloak, please refer to Authentication page.
- Click on "Log In with Keycloak"
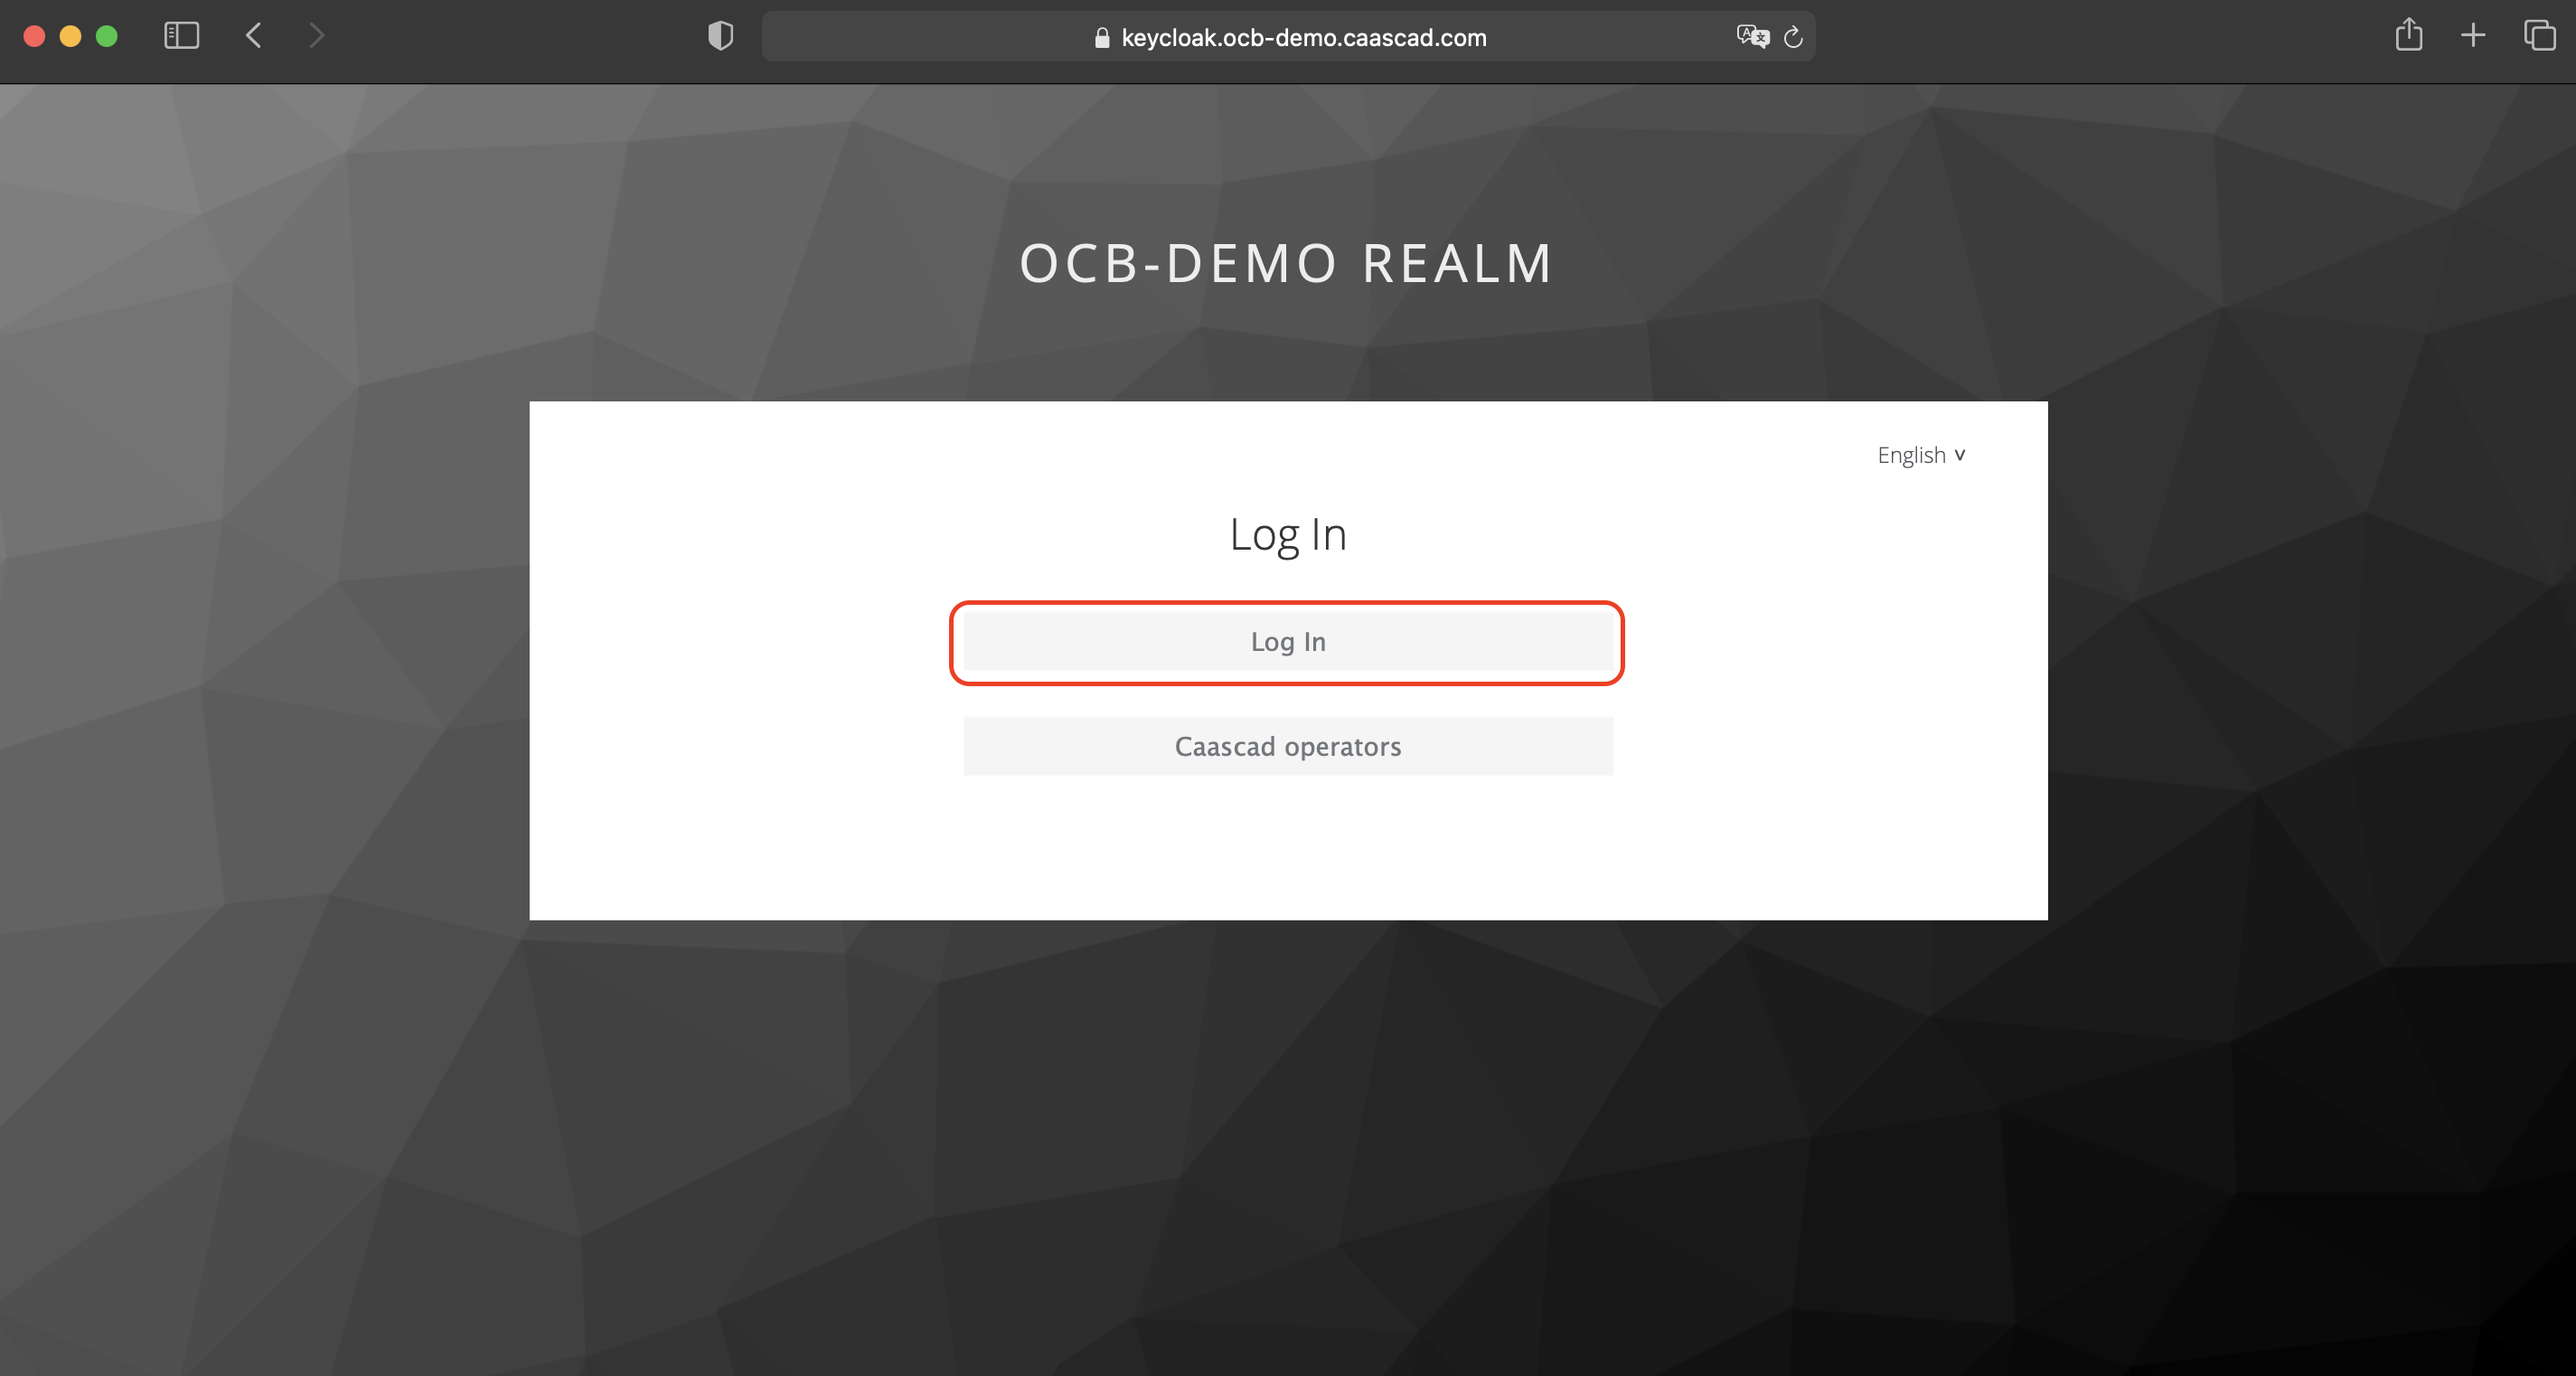
- Click on "Log In"
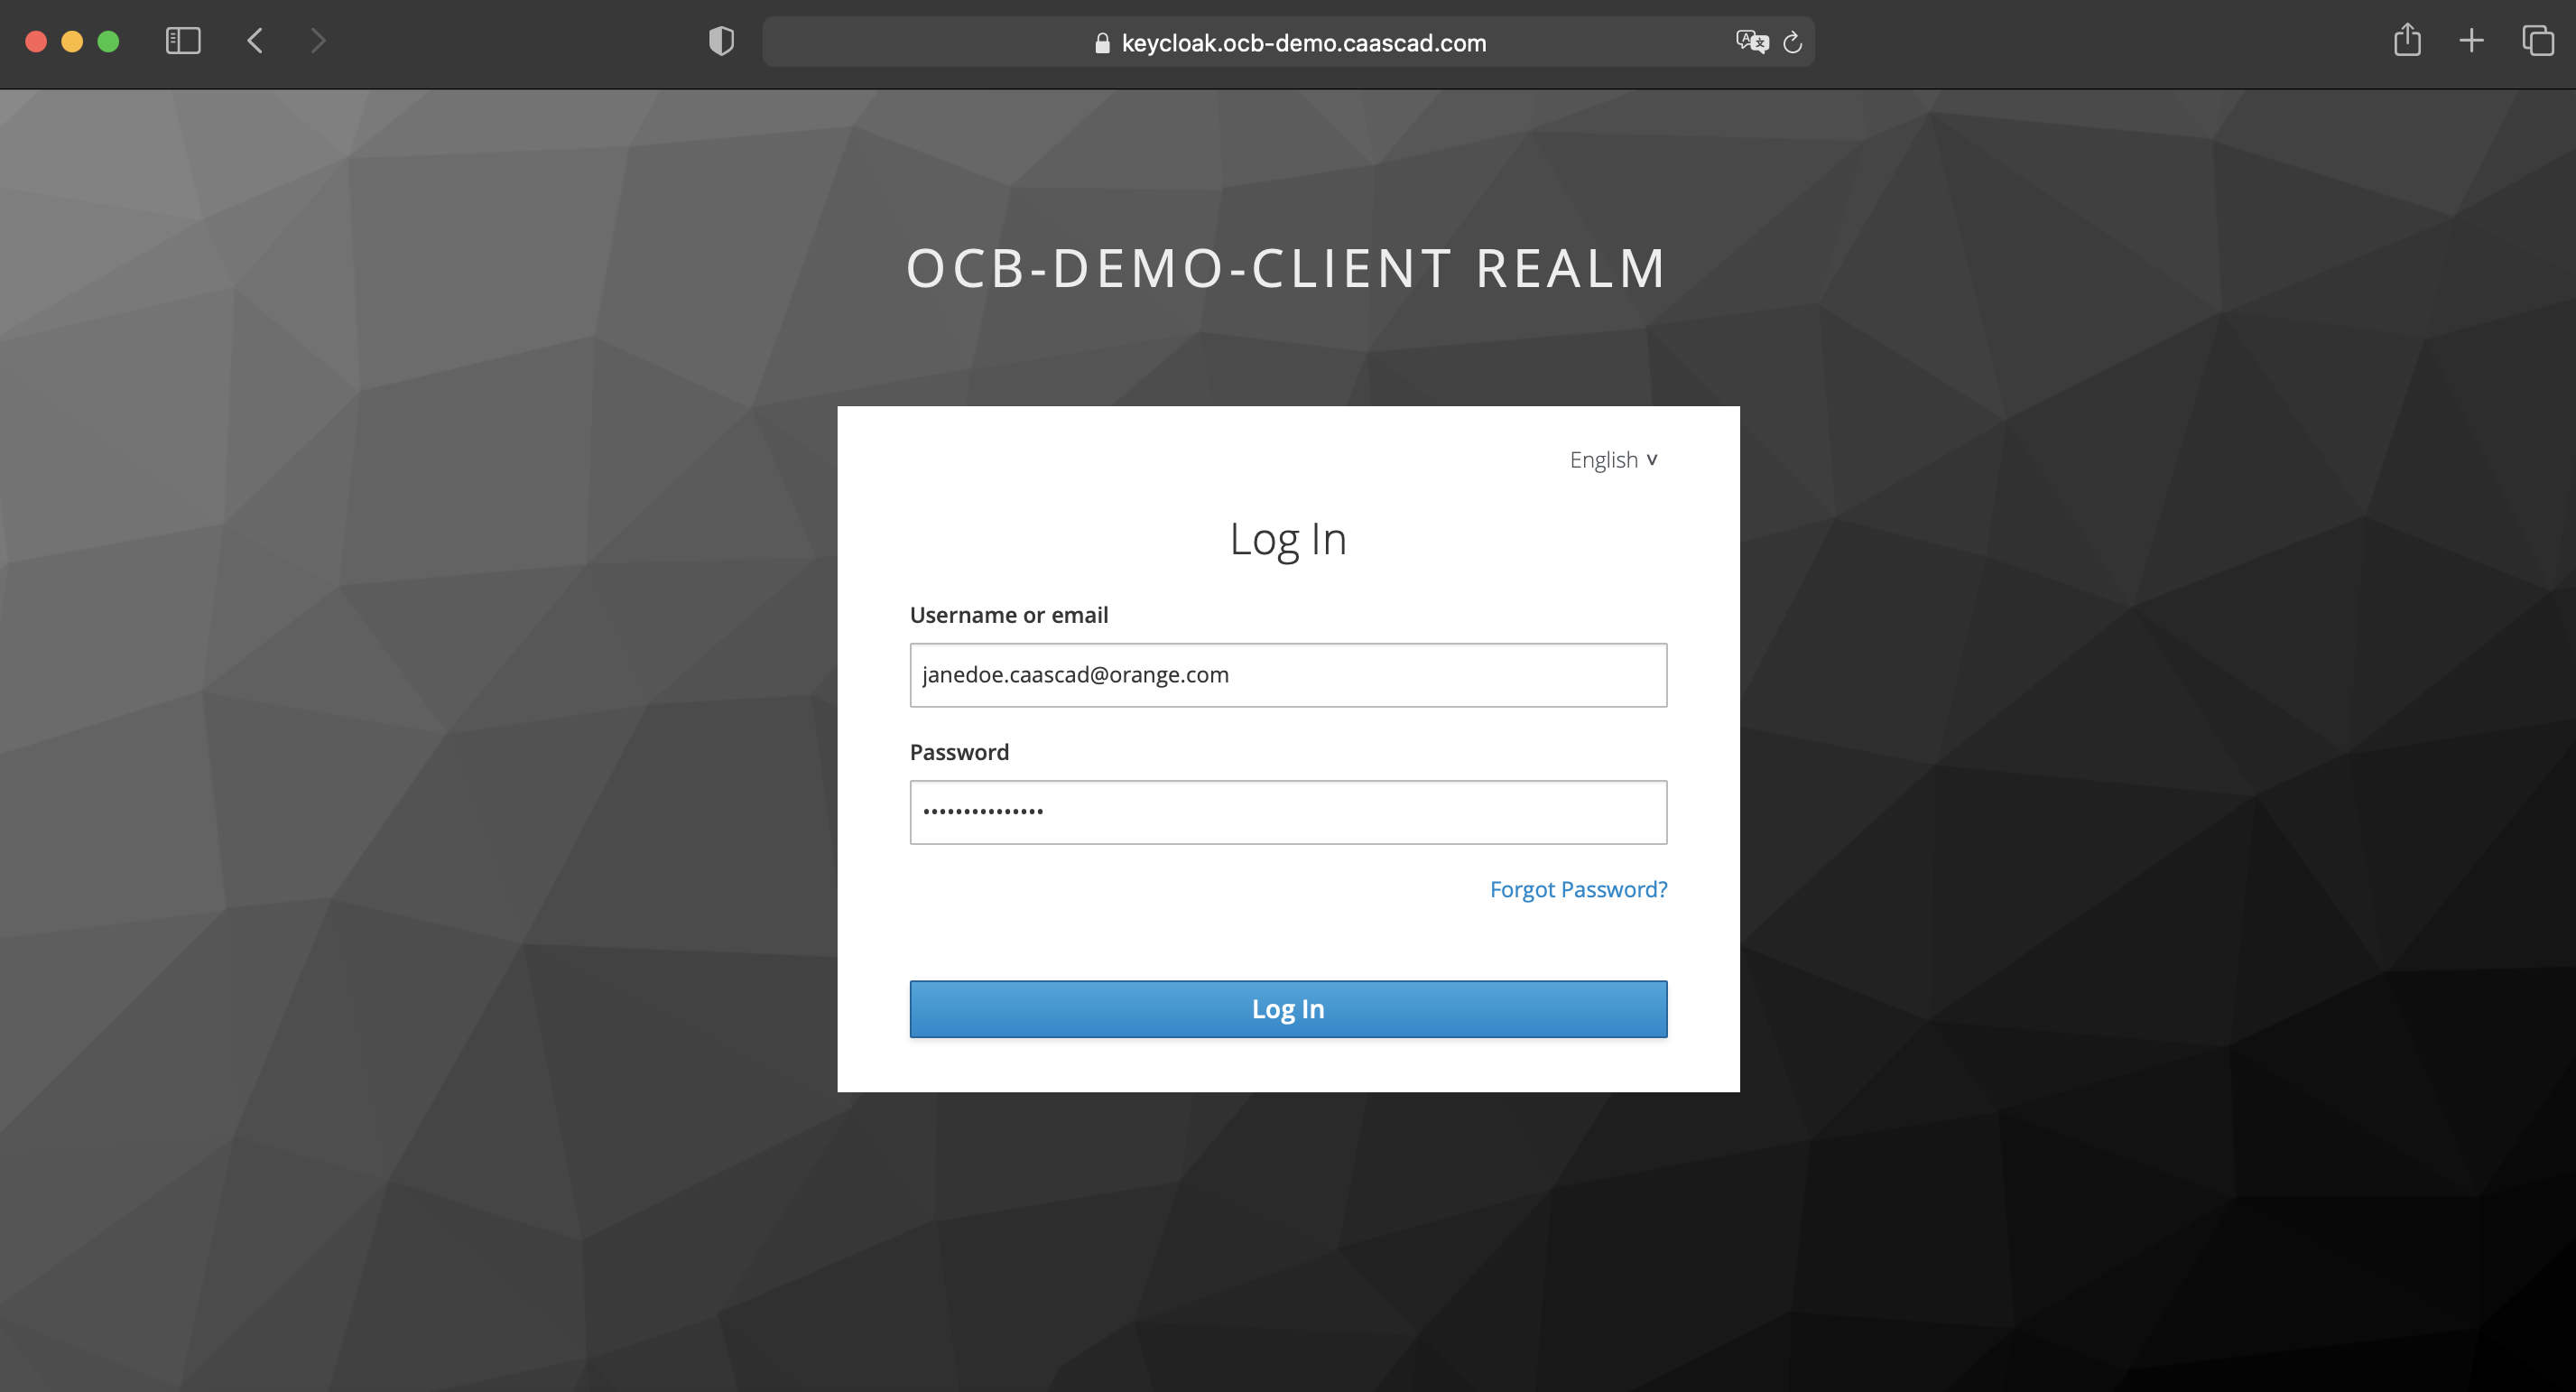
- And then enter your User/Password
- You are now ready to use Rancher !
Access a cluster with kubectl and kubeconfig
This section describes how to manipulate your Kubernetes® cluster with kubectl from the Rancher UI or from your workstation. For more information on using kubectl, see Kubernetes® Documentation: Overview of kubectl.
Accessing clusters with kubectl shell in the Rancher UI
You can access and manage your clusters by logging into Rancher and opening the kubectl shell in the UI. No further configuration necessary.
- Log into Rancher. From the Global view, open the cluster that you want to access with kubectl.

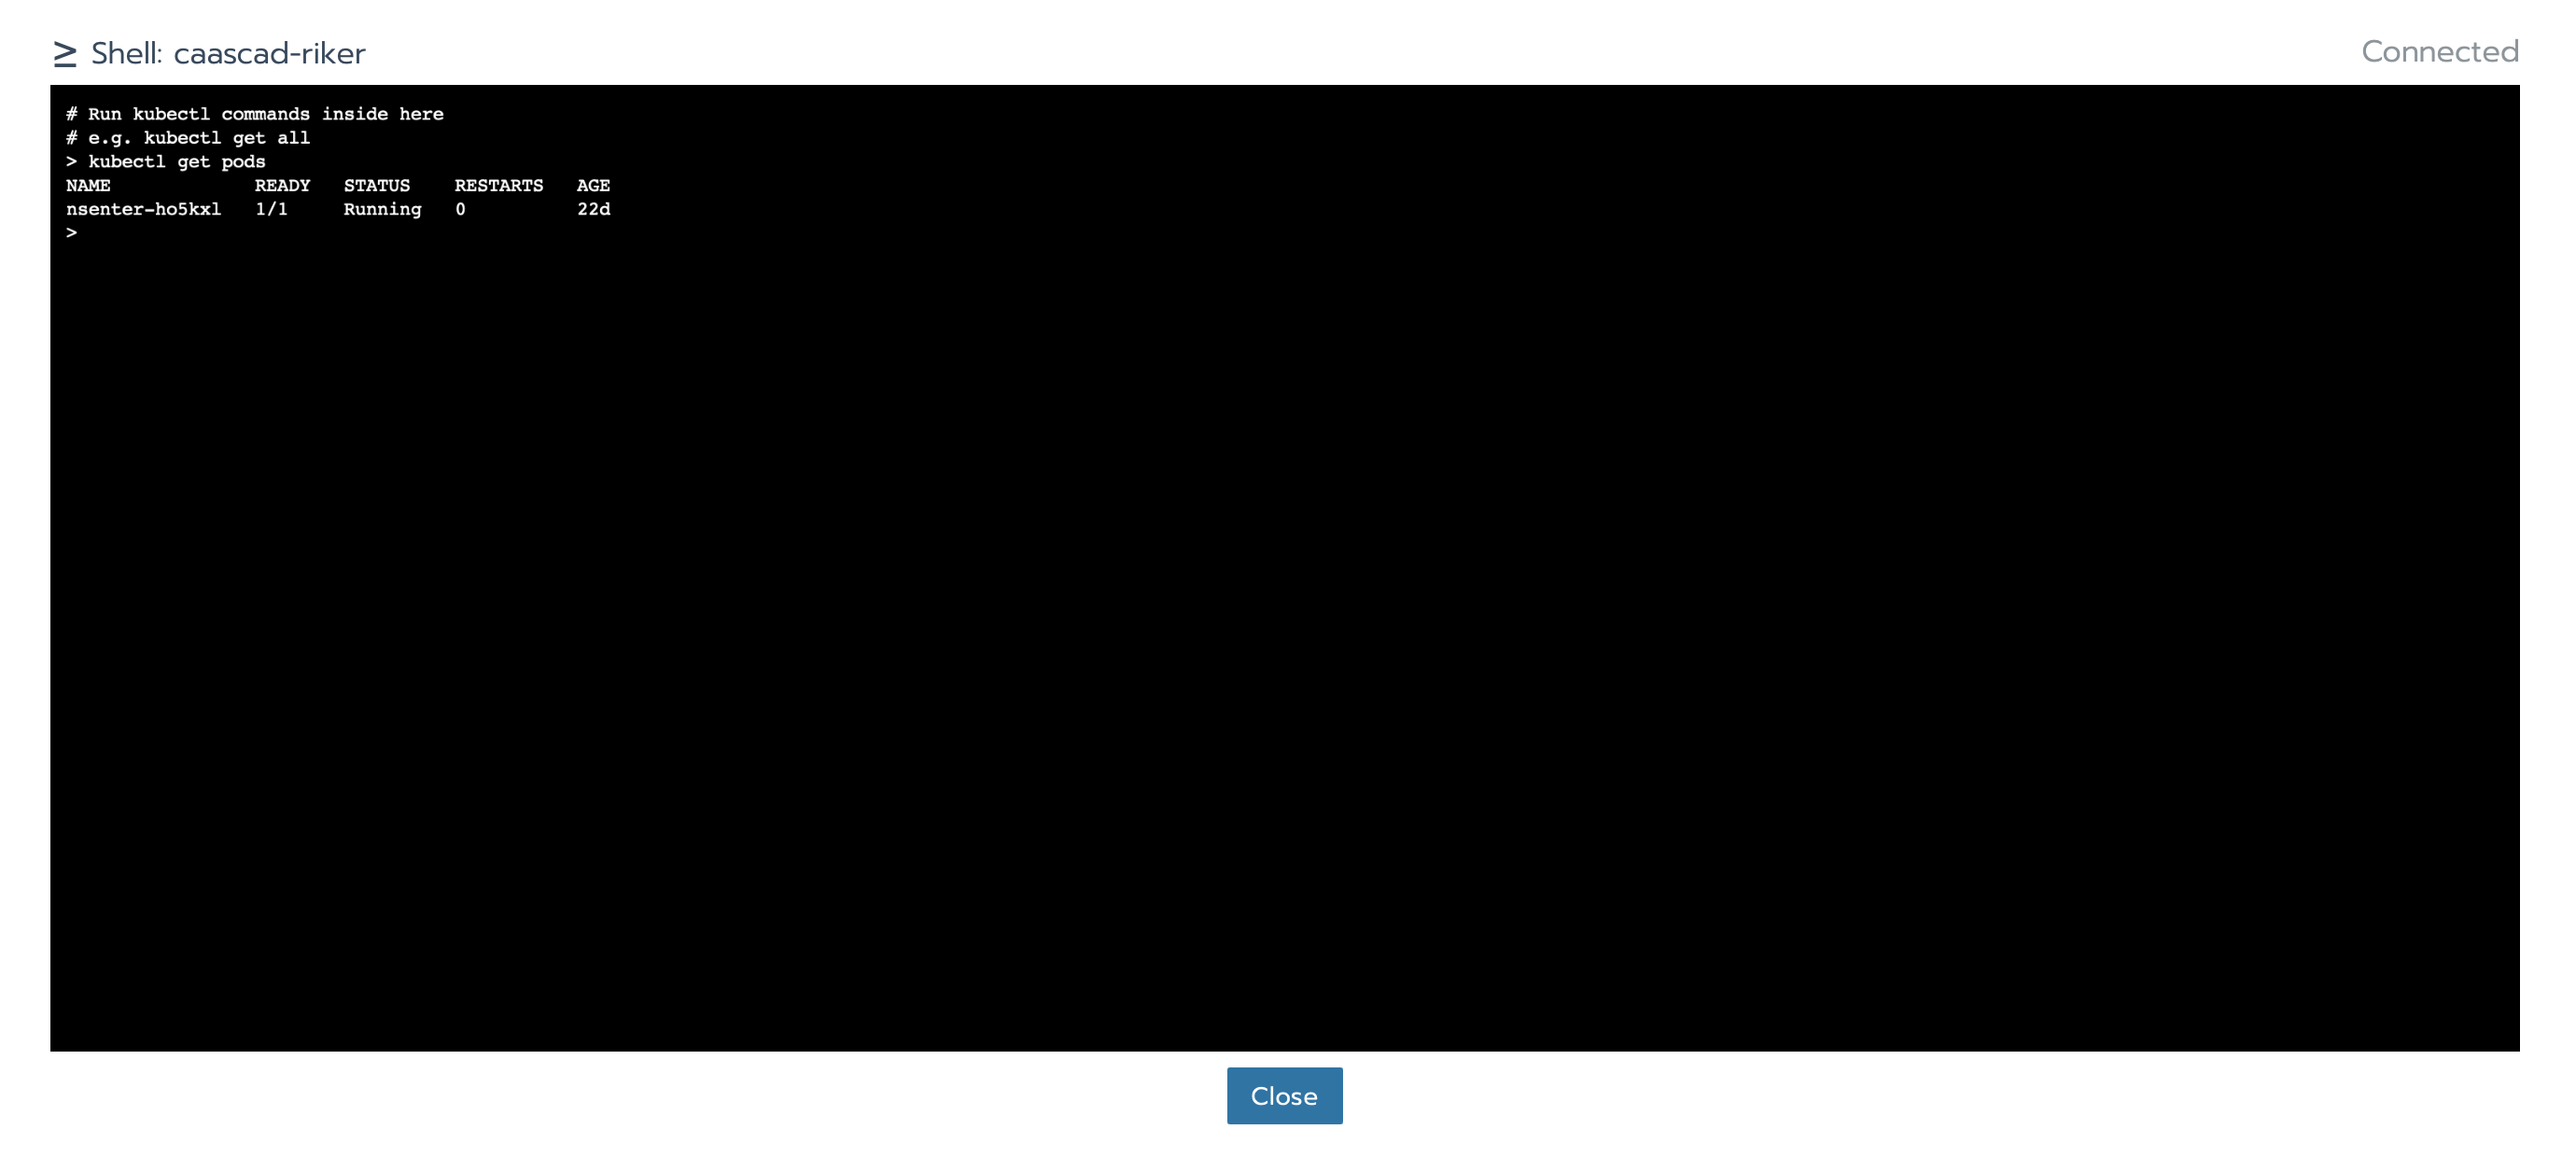
- Then, click Launch kubectl.
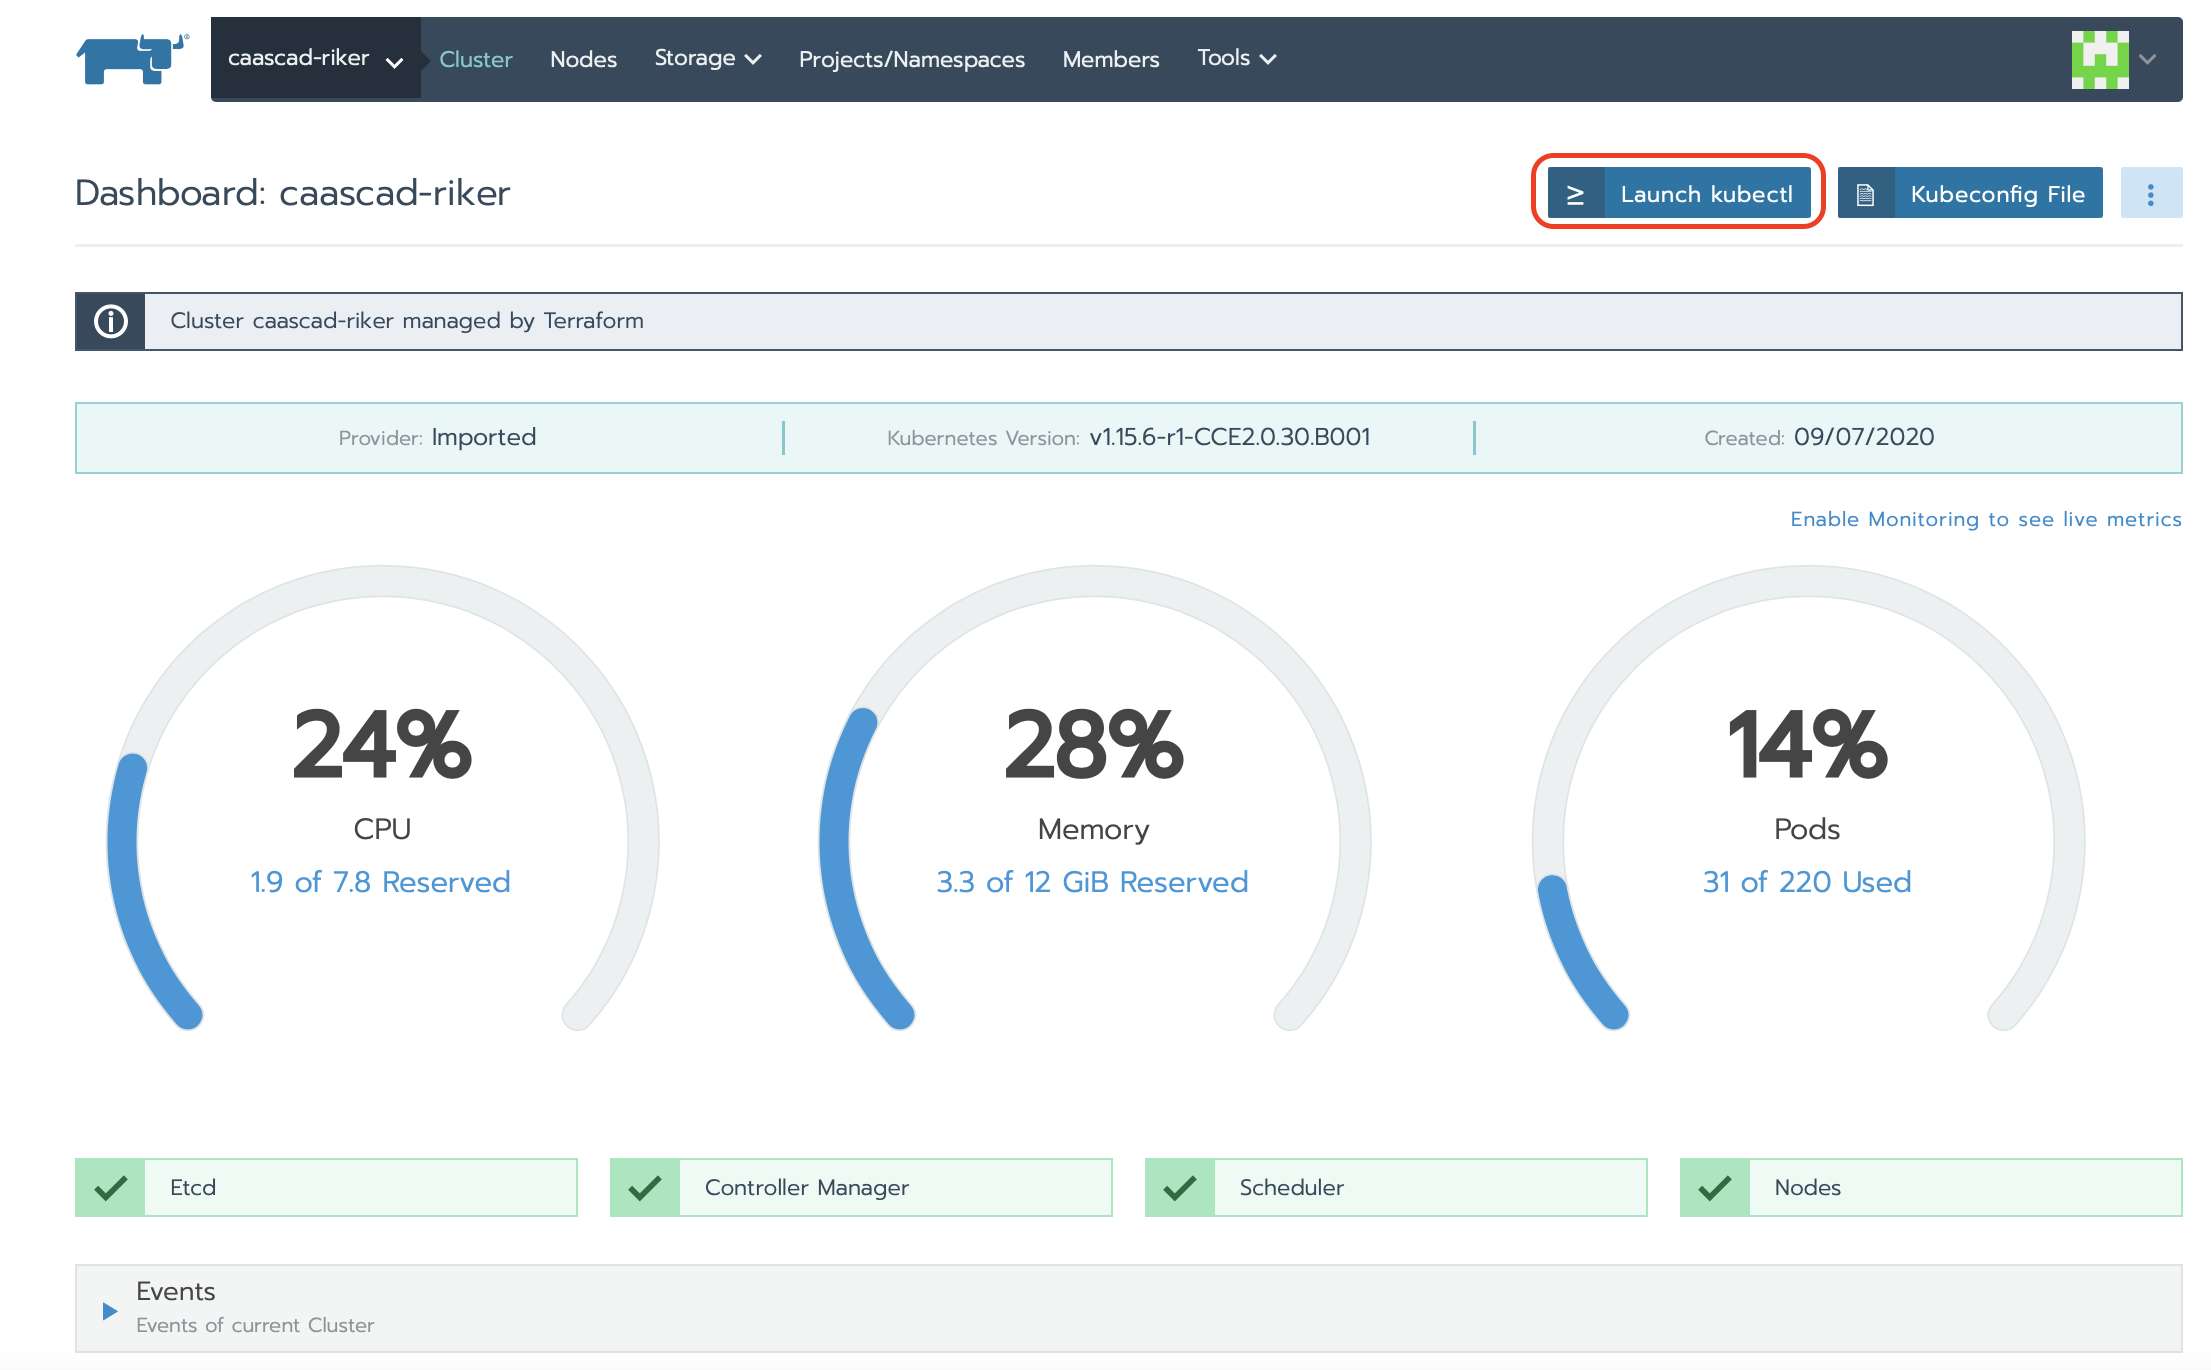
- Use the window that opens to interact with your Kubernetes® cluster.
Accessing clusters with kubectl from your Workstation
This section describes how to download your cluster’s kubeconfig file, launch kubectl from your workstation, and access your cluster.
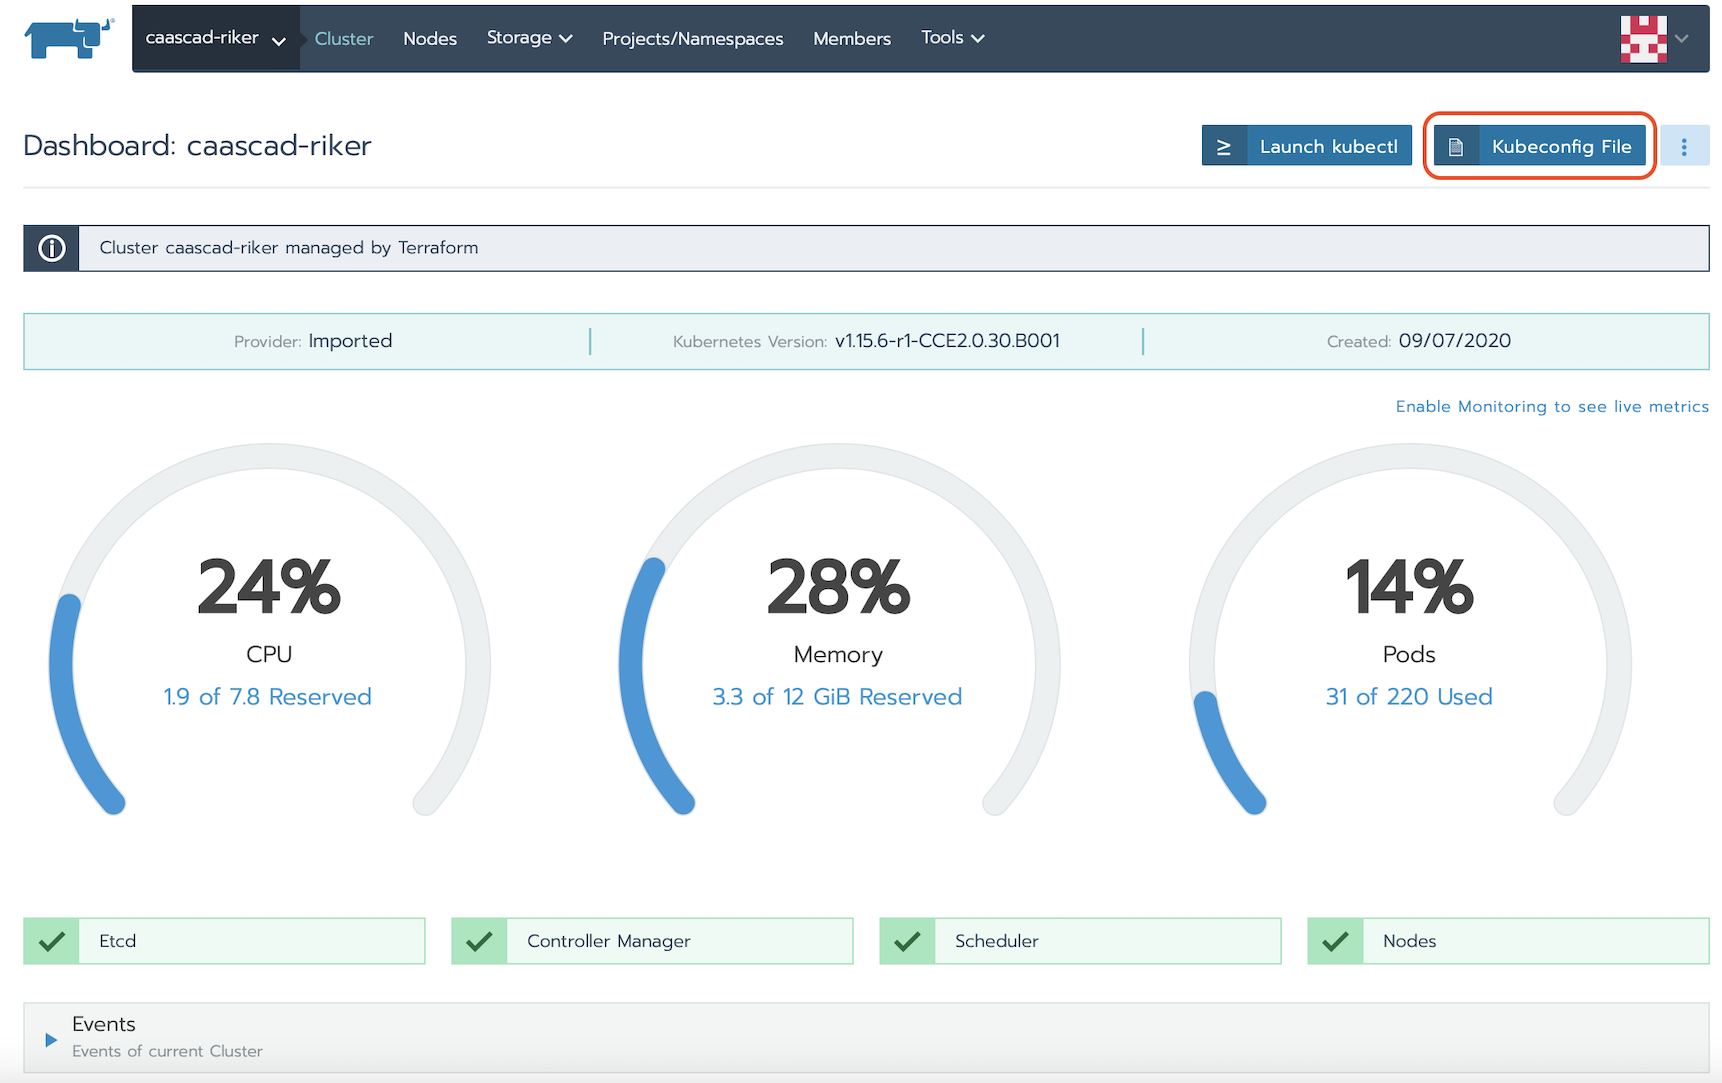
- From the Global view, open the cluster that you want to access with kubectl.

- Click Kubeconfig File.
- Copy the displayed contents to your clipboard.
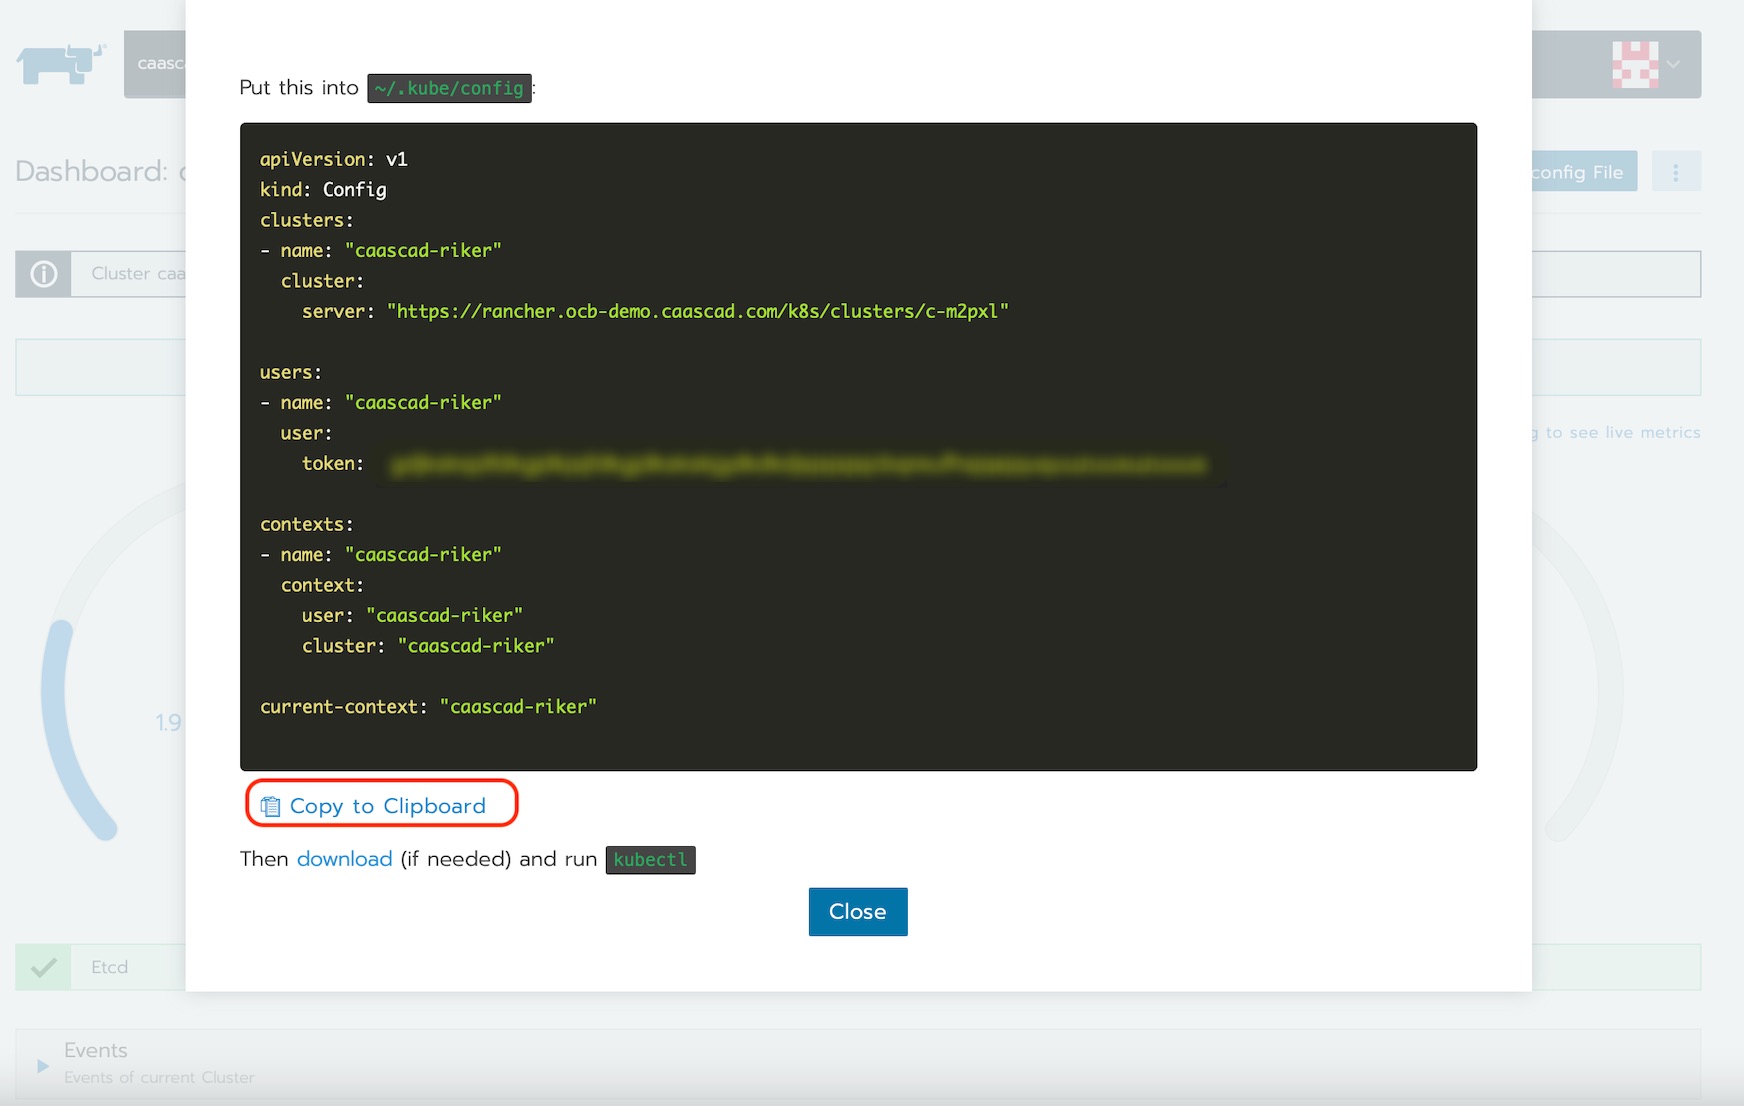
- Paste the contents into a new file on your local computer and move the file to
~/.kube/config.
cp /path/to/config-file ~/.kube/config
- Now, from your workstation, launch kubectl and use it to interact with your Kubernetes® cluster.
Tips
If you have installed upstream Kubernetes® command line tools such as kubectl or helm you will need to configure them with the correct kubeconfig path. This can be done by either exporting the KUBECONFIG environment variable or by invoking the --kubeconfig command line flag.
- Leverage the KUBECONFIG environment variable:
export KUBECONFIG=$HOME/.kube/config
kubectl get pods --all-namespaces
helm ls --all-namespaces
- The default location of the kubeconfig file is
~/.kube/config, but you can use any directory and specify it using the --kubeconfig flag, as in this command:
kubectl --kubeconfig /custom/path/kube.config get pods
API Keys
If you want to interact with Rancher programmatically, you need an API key.
API Keys are composed of four components:
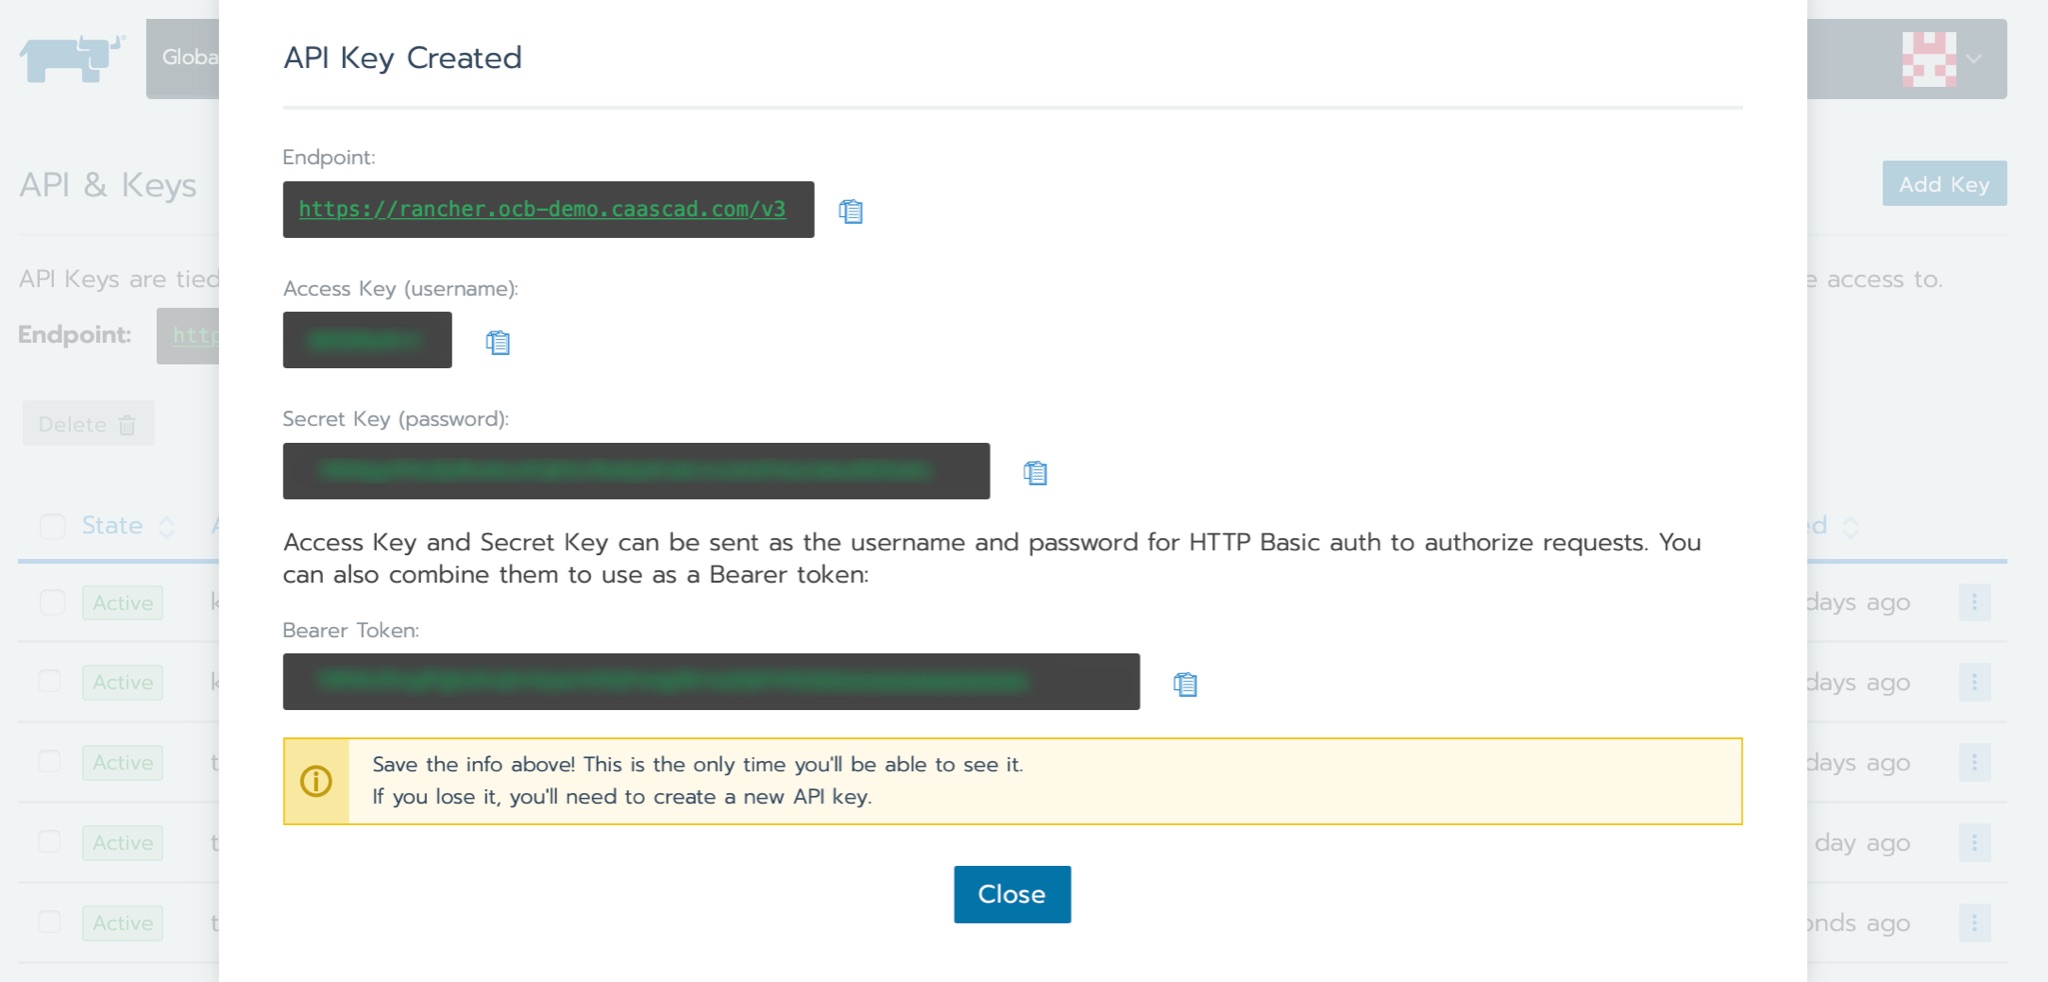
- Endpoint: This is the IP address and path that other applications use to send requests to the Rancher API.
- Access Key: The token’s username.
- Secret Key: The token’s password. For applications that prompt you for two different strings for API authentication, you usually enter the two keys together.
- Bearer Token: The token username and password concatenated together.
Follow the directions in this section to obtain a Key:
Create an API Key
- Select User Avatar > API & Keys from the User Settings menu in the upper-right.

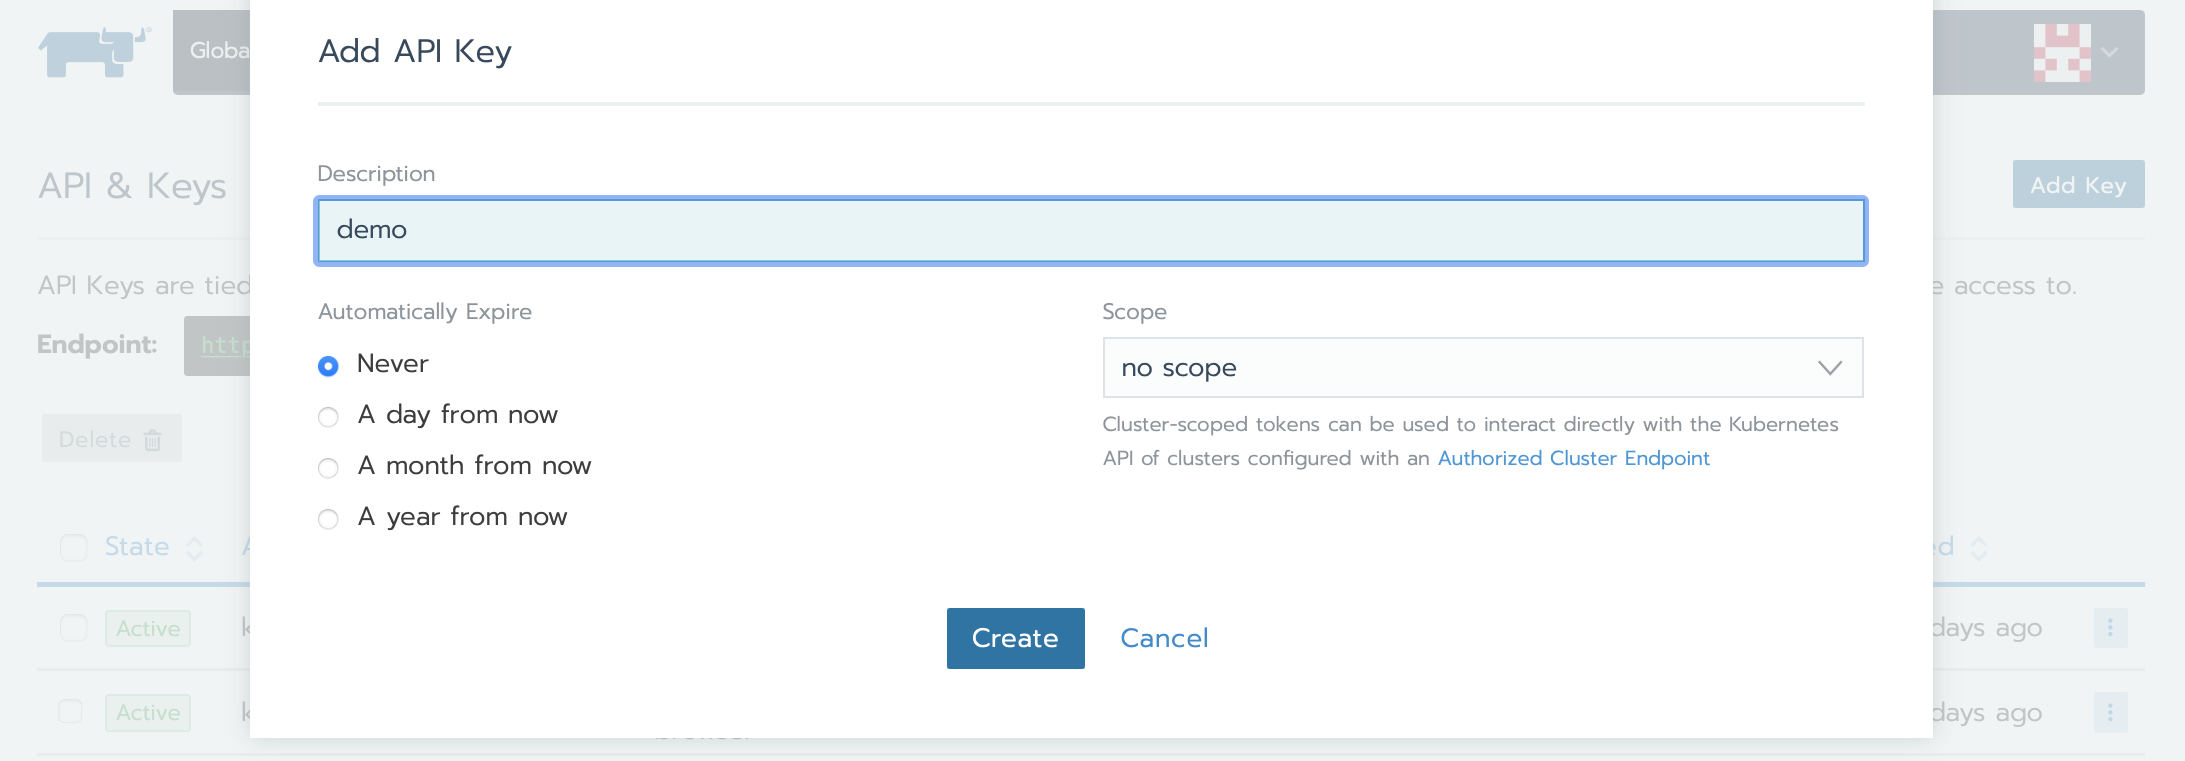
- Click Add Key.
Tips
- Enter a description for the API key and select an expiration period or a scope. It is highly recommended to set an expiration date.
- The API key won’t be valid after expiration. Shorter expiration periods are more secure.
-
Click Create.
-
Save the displayed informations.
Your API Key is now created. Your API Endpoint, Access Key, Secret Key, and Bearer Token are displayed.
-
Copy the information displayed to a secure location. This information is only displayed once, so if you lose your key, you’ll have to make a new one.
-
Use the Bearer Token to authenticate with Rancher CLI.
Use API Keys
In kubeconfig file
API Keys can also be used to access your Kubernetes® clusters by adding the "Bearer Token" to the "token" section of the kubeconfig file. Or stored in Vault to be consumed by other applications like the CI.
In Queries
It is possible to use these keys to retrieve information about Kubernetes® objects through the Rancher API as well. For example, the following query allows you to retrieve the metrics of a service deployed in one of your Clusters.
curl -X GET -H "Authorization: Bearer ${RANCHER_ACCESS_KEY}:${RANCHER_SECRET_KEY}" "https://${RANCHER_URL}/k8s/clusters/${CLUSTER_ID}/api/v1/namespaces/${NAMESPACE}/services/${SERVICE_NAME}:${PORT}/metrics"
- You can find the value of
CLUSTER_IDin the kubeconfig file you created, or in your browser's address bar after selecting a cluster.
API Keys with Time-to-live (TTL)
Time-to-live can be specified during API keys creation. This option applies on a per user basis and does not limit token validity by default. However, a maximum token validity can also be enforced widely to enhance security and force old tokens expiration.
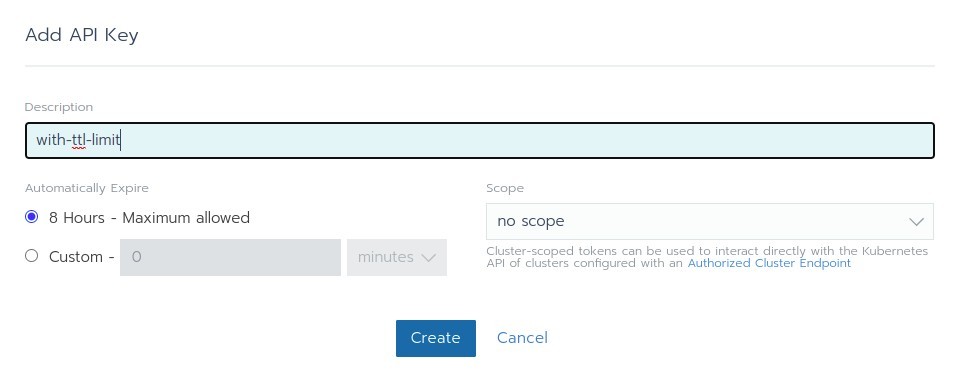
Enabling this feature automatically provokes invalid users' tokens expiration (i.e. Tokens whose TTL exceeds maximum TTL allowed are deleted). Carefully note that deletions also concern kubectl tokens used to access Kubernetes® API through Rancher.
Getting a new kubeconfig for kubectl will be required after this operation (see Access a cluster with kubectl and kubeconfig). The new configuration is slightly different from the previous one: API tokens are not stored in kubectl configuration but fetched by kubectl at runtime with the help of rancher CLI.
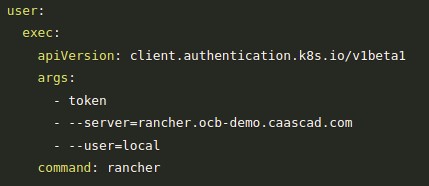
Links to download rancher CLI are available in Rancher UI (right side of the footer).

If you want to use this feature, please contact Caascad support.
Warning
The chosen TTL limit applies to every zone managed by a single administrative zone!